Baby bottles can be breeding grounds for bacteria, whether you are filling them with either formula or breast milk. Since the last thing you want is for stubborn germs to find their way into your baby’s body, it’s a good idea to sterilize your baby’s bottles occasionally.
It’s not the most exciting part of parenting, but, on the bright side, there are several cleaning methods you can choose from to get the job done. So let’s talk about how to sterilize baby bottles.
How to sterilize baby bottles — FAQs
How often to sterilize baby bottles?
Our modern technology has, thankfully, ushered in an era of clean water for most households, so it’s not necessary to sterilize your bottles after every use.
With that said, sterilization is still an essential part of keeping your baby bottles germ-free. The most critical time to sterilize is when your bottles are fresh out of the package.
Always assume that they were not made or handled in a sterile environment before being packaged up and shipped out to stores. This rule applies to bottles purchased second-hand and even those given to you by family or friends.
Per CDC recommendations, you would want to sterilize your bottles more often if your child was born prematurely, has a weakened immune system, or if your baby is younger than three months old.
If your little one has been sick, it is prudent to give all your feeding equipment proper sterilization to avoid ping-ponging those germs back into your baby’s body.
Many health officials believe that properly washing your bottles in clean water negates the need for frequent sterilization. If you suspect that your water supply is harboring any contaminants, then go through the sterilization process more often.
Related: Why Is My Baby Refusing Their Bottle?
Do I need special equipment to sterilize baby bottles?
A perk of sterilizing baby bottles is that you do not need to rush out to the store and buy an expensive piece of specialized equipment.
There are several sterilization methods that you can perform with things you already have in your kitchen. So, unless you think it would be more convenient for you, feel free to leave that bottle sterilizer off your baby registry.
How do I sterilize a bottle sterilizer?
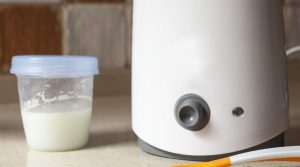
So you opted for an electric bottle sterilizer and suddenly realized the cleaner has become the needs-to-be-cleaned. No worries!
First things first: check your product’s instruction manual; this will provide you with specific cleaning and maintenance tips for your product model.
Cleaning your sterilizer with a water and vinegar mixture is generally a safe route to go. Simply mix up a 1:1 ratio and let the liquid sit for at least 30 minutes in the sterilizer.
Can both glass and plastic bottles be cleaned the same way?
Thankfully, yes. You won’t have to give either material any special treatment.
Just remember only to use plastic bottles that are BPA-free (avoid anything with the number 7 on it) since the sterilization process can allow chemicals in these plastics to seep into milk during later uses.
Will sterilizing damage my baby bottles?
Too much sterilizing can, indeed, erode and weaken any material over time. Be sure to inspect all your bottles and teats regularly and discard anything that’s warped, cracked, or otherwise showing signs of wear.
When can I stop sterilizing baby bottles?
To be on the safe side, you should occasionally sterilize baby bottles for as long as your little one is using them for meals. Many parents have switched their kiddos from bottles to cups by the time they are 12 months old, as cups are generally easier to clean.
Related: The 10 Best Baby Bottles to Buy in 2021
How to sterilize baby bottles
There are a few tried and tested ways to get those bottles squeaky clean. They all yield the same results, so feel free to use whichever method is the most convenient for your household.
Before you choose how, and how often, you’re going to sterilize your baby bottles, be sure to give any instructions received with the packaging a quick once over. You might find that the manufacturer has included their own preferred method for use with their bottles.
When sterilizing baby bottles, always be vigilant around boiling water and steam, as both are burn hazards. Keep your children and pets at a safe distance, and use gloves or tongs to handle hot bottles and nipples.
Before sterilizing
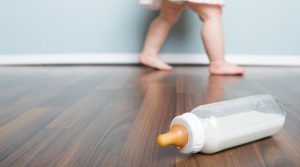
Ideally, you should clean your baby bottles after every use. If one has been left sitting around after a feeding (hey, it happens!), be sure to wash it with soapy, hot water.
The sterilization process will obviously be most effective on a clean surface free from milk stains, etc.
Sterilizing baby bottles with boiling water
You will need a pot large enough to submerge the bottles and nipples completely, a pair of clean tongs, and a way to bring water to boiling point for several minutes. The easiest way to accomplish this is, of course, on your stove.
- Clean the area where you will be sterilizing and drying your baby bottles.
- Fill your pot with enough water to cover your baby bottles and nipples.
- Submerge the baby bottles upside down, allowing water to fill to the entire cylinder without any air bubbles. Place the nipples in the water, too.
- Bring the water to a boil on your stove, keeping it boiling for at least five minutes. The back burner is the safest one to use for boiling water as there is less chance of it being knocked to the floor.
- Switch the heat off and use your tongs to remove the bottles and nipples.
- Place everything on a clean towel to dry.
Sterilizing baby bottles with a microwave
There are two ways to use a microwave to sterilize your bottles.
For the first technique, you will need an additional piece of equipment: a microwave sterilizer. Microwave sterilizers are products that will encase baby bottles and teats and, with the addition of water, create steam hot enough to eliminate germs.
Instructions will vary based on which product you purchase, but here are the broad strokes.
Thoroughly clean and sanitize your microwave with an appropriate cleaner, making sure the inside is free from food or other gunk.
- Place the bottles and teats in the sterilizer.
- Add the recommended amount of water to the sterilizer and close up the container.
- Microwave the container as per the amount of time recommended by the instructions.
- Check the instructions for how long your bottles can stay in the container before they will need to be resterilized.
If you do not wish to purchase a sterilizer, you can also sanitize your bottles in the microwave by using the following steps.
- Make sure your microwave is clean.
- Fill the bottles up halfway with water.
- Place nipples into a microwavable bowl filled halfway up with water.
- Microwave the bottles and bowl for about 90 seconds.
- Allow bottles and nipples to cool or use your tongs to place them on a clean towel to air dry.
Sterilizing baby bottles in a dishwasher
To go this cleaning route, your dishwasher needs to come equipped with a sanitizing mode. Ideally, it will also be NSF/ANSI 184 certified. This certification guarantees that, during a sanitization cleaning cycle, a longer hot-water rinse will take place, and that the water will reach 150℉. This heat will kill 99.99% of bacteria.
- Load the bottles into the top rack of the dishwasher.
- Load the nipples into your dishwasher’s basket.
- Select the sanitize option and, if possible, the heated dry option on the control panel.
Sterilizing baby bottles on the go
Carting around a sterilizing machine or searching for a stove in a hotel on which to boil water can be just a little tricky when you’re traveling with your baby.
Okay, technically, everything is tricky when traveling with your baby. Luckily, sterilizing baby bottles just got a whole lot easier when you’re on the go.
Sterilizing tablets are readily available on the market. These will sanitize in cold water in a short amount of time. They are safe, leave no residual odor, and often don’t even need to be rinsed off.
Every product will have different instructions, so be sure to pick one that works for your particular needs, and follow the given instructions.
How do I store sterilized baby bottles?
Once you’ve taken the time to sanitize your baby’s bottles, you want them to stay clean for as long as possible. Placing them in a sealed container in the fridge is the easiest way to keep them clean.
If using a bottle-sterilizing machine, some models allow you to leave bottles in the cleaning compartment after the sterilization process is complete.
They won’t stay sterile in there forever, so be sure to check the instructions to see how long you have before you would need to run them through another sanitization cycle.
Wrapping up
When deciding how to sterilize your baby bottles, rest easy in knowing that one way isn’t necessarily better than another. All that matters is that your baby is drinking out of a clean bottle that’s as germ-free as possible.
This involves washing your bottles after each use to aid the sterilization process, using plenty of heat or tablets designed to work in cold water when sterilizing, and safely storing your bottles after they’ve been sanitized.
Bottoms up!