You’ve done your research (or taken the advice of a fellow parent) and settled on a balance bike for your toddler. You know by now that the best part of a balance bike is its simplicity, which takes a lot of stress out of the process.
Learning how to ride a balance bike makes intuitive sense to many children, considering there are no pedals, and they stand or sit on the bike while propelling forward by walking or running. Some kids won’t even need to be told what to do, while others will need a little more coaching and encouragement.
Here’s an idea of what the general learning process will look like and what you can expect.
You can check out our updated list of the best balance bikes if you’re still stuck in review-reading purgatory.
What’s the best age to introduce a balance bike?
While many parents and experts believe the younger the better, it depends on each individual child. Some toddlers are simply not ready to hop on a balance bike at 18 months, and I personally think there’s value in waiting for the right time.
That being said, you can introduce a balance bike around 18 months or even closer to a year if your child seems ready. Balance bikes are going to be used the most from ages 2-4, though some kids will be younger, while others will take their time. As many of us know, there’s also a big difference in what the oldest child vs. the youngest child is willing to try.
If you’re still not sure whether to go with training wheels or a balance bike, check out the reasons why we recommend a balance bike.
Phase 1: Standing & walking
After the seat is properly adjusted and their helmet is on, it’s time to practice getting on and off of the bike. Resist the urge to lift them onto the seat and instead teach them how to do it. Once they have that down, encourage them to move their feet, walking slowly while the bike inches forward.
Some kids will need to be shown how to do this, some kids will already be on Phase 3, and both are fine. The first phase will probably be the longest one, and the younger your toddler, the longer it may take.
Phase 2: Sitting & walking
A lot depends on the age and personality of your child, but the next natural step is fully sitting on the bike seat while walking. Once they begin to sit, you may realize the seat height needs to be tweaked a bit for the best fit.
Encourage your toddler to look up so that they’re aware of their surroundings. Many kids tend to stare at their feet when they’re first learning, which can cause some spills. It helps to get them around other bike riders, like older siblings, friends, or kids at the park. Seeing someone else doing it (and wanting to keep up!) can be highly motivating.
Phase 3: Sitting while balancing
If your child has mastered the first two phases, they might think that it stops there. This is where a bit more coaching might be needed for cautious or timid toddlers. As they pick up some speed, have them try to lift one foot at a time while maintaining their balance. Remind them that they’re very low to the ground and can easily catch or stop themselves at any time.
This is also a good time to teach your child how to stop on their bike (if they haven’t already figured it out). All they need to do is plant their feet firmly on the ground until they come to a full stop.
Try to discourage them from using the tops of their sneakers, which is less effective and will ruin their shoes! If their balance bike does have hand brakes, it’s easier to learn after they can balance and glide.
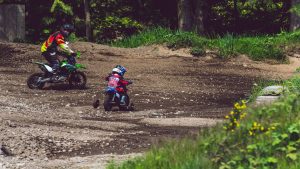
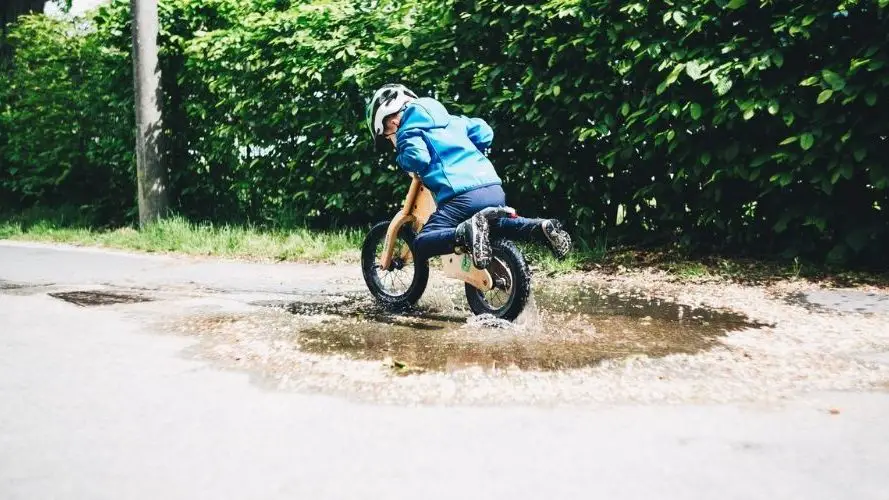
Phase 4: Sitting while gliding & running
When your child is ready for this phase, an open space like a parking lot or park is best so that they really have some room to roam. By using their feet to run, as well as lifting both feet and balancing, your child will be able to glide for longer distances. This is where things really get fun!
To encourage gliding, you can have them ride down a sloped area to pick up speed. Once they’re gliding with ease, you can explore different trails, bike parks, or try out small ramps.
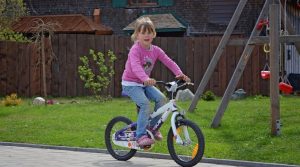
After they’ve mastered the art of riding a balance bike, let them enjoy it for a bit. While balance bikes do make for a smooth transition to a two-wheeler, you don’t have to rush it. Balance bikes are fun, pure and simple, as well as easier to carry and transport than traditional bikes.
When you do feel that they’re ready, or they ask for a bike with pedals, it will hopefully be a smooth and easy transition. More and more experts today recommend starting with a balance bike because they believe that learning to balance first, then to brake and pedal is a simpler, more commonsense approach.1OUTDOORSTOYS The Best Balance Bike
nytimes.com)
Tips & tricks
- You and your toddler are ready to dive in, but there are a few things to get squared away before you hit the pavement.
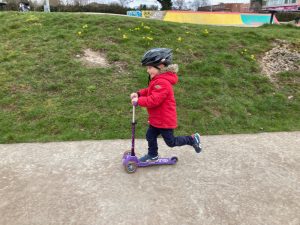
- Make sure you have the right size bike and helmet. Start with an appropriately sized helmet and balance bike, a smooth paved area, and sneakers. Check out our guides on how to choose a balance bike and how to size a helmet. Your child may want knee and elbow pads, although they’re not necessary. Balance bikes have a lower center of gravity and kids can catch themselves easily with their feet or hands if they do fall.26 reasons why balance bikes are great for kids
medibank.com - Choose carefully when it comes to extra features. Most balance bike enthusiasts agree that hand brakes are a great learning tool for kids learning how to ride, although a balance bike does not need them. They also give a nervous rider some additional security.
- However, it’s probably best to avoid footrests. Not only do most kids not need or want them, but they can also impede your child’s stride.
- Adjust the seat correctly. Your child’s knees should be slightly bent with their feet firmly on the ground. With the proper stance, they’ll be able to walk, run, glide, and stop themselves with ease.
- Choose a bike with a seat height that is about 0.5” shorter than your child’s inseam.
To measure your child’s inseam, place the spine of a book near their crotch, and measure from the spine of the book to the floor. - Be prepared to take it slow. I’ve found that ten minutes a day is better than an hour once a week. You both get less frustrated, it’s an enjoyable activity, and you’re not forcing them to keep at it long after they’ve lost interest. We all know toddlers can sense when you want something to happen, and then they do the exact opposite. Play it cool.
- Make it fun. Balance bikes are very lightweight and easy to throw in the trunk of just about any car. Bring it along to the park, and take it on walks and bike rides with siblings or friends. Try it out on a variety of surfaces and different settings. Gently encourage and re-introduce as needed. If you can tell your child is simply not ready, put a pause on the learning and come back to it later.
Related: A Comprehensive Guide to Choosing a Balance Bike
Wrapping up
Teaching your toddler how to ride their first bike is an exciting milestone worth celebrating!
As you begin, keep in mind that an adventurous 3-year-old is going to pick up the process much quicker than a cautious 18-month-old.
Depending on age and personality, it could take a week, or it could take 6 to 12 slow and steady months. Let them go at their own speed, keep at it, and have fun!